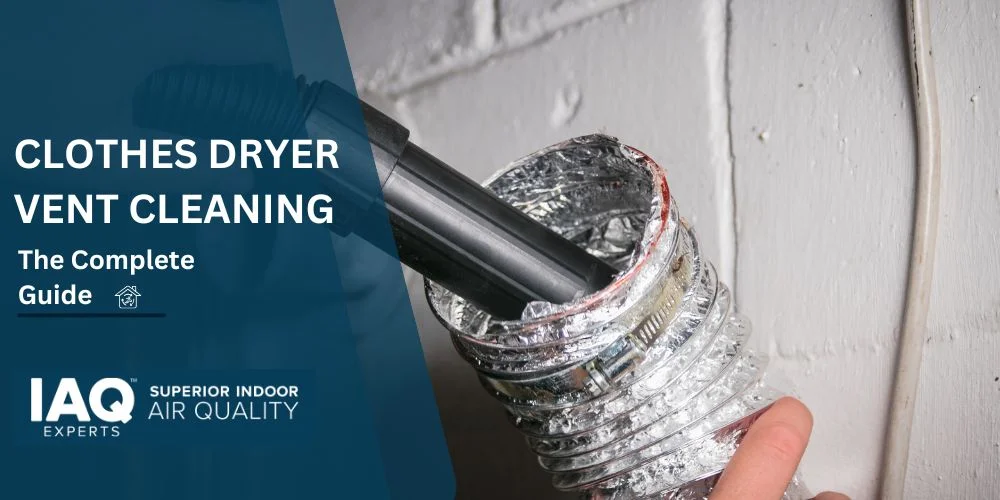
Clothes dryer vent cleaning is one of the most important yet overlooked parts of home maintenance. While most homeowners remember to clean the lint trap, far fewer realize that lint continues to build up deep inside the vent system. Over time, this buildup restricts airflow, reduces efficiency, and creates a serious fire hazard.
In this guide, you’ll learn how clothes dryer vent cleaning works, why it matters, how often to do it, and when it’s time to bring in a professional.
What Is Clothes Dryer Vent Cleaning?
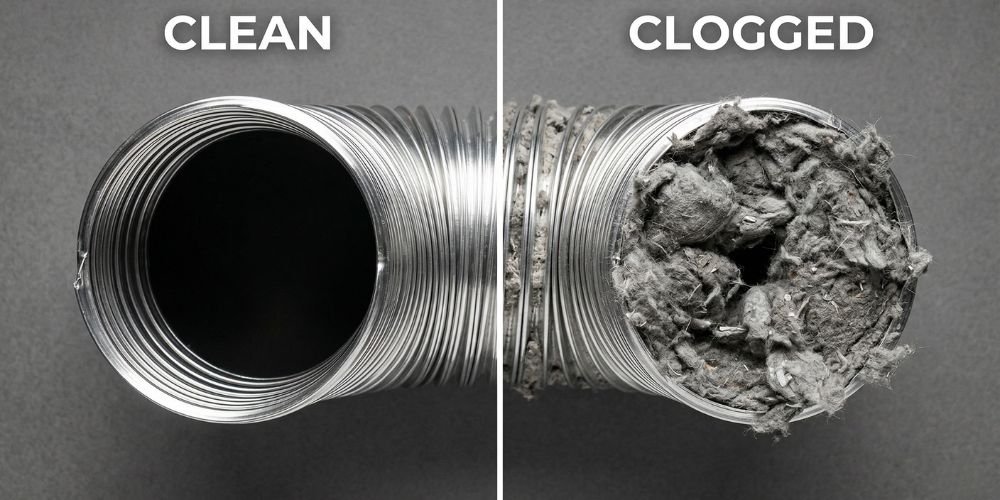
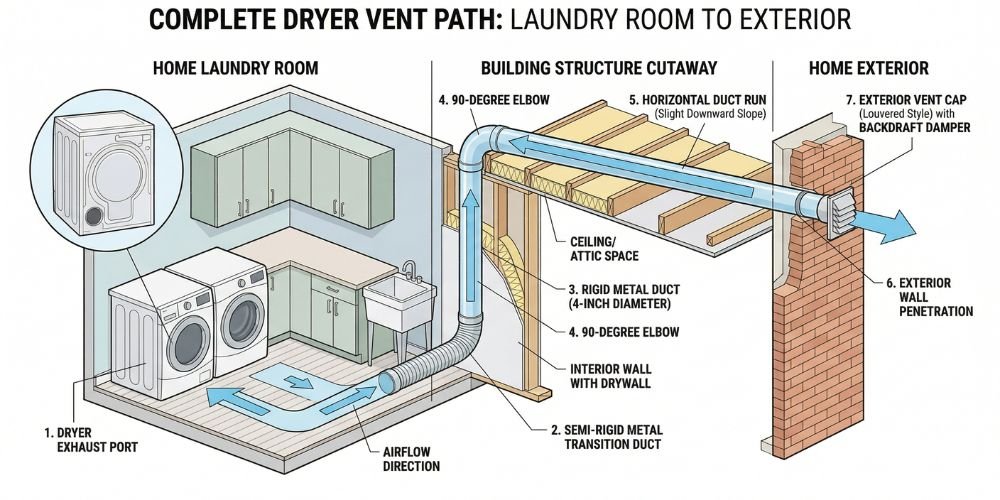
Clothes dryer vent cleaning refers to removing lint, dust, and debris from the duct that carries hot air from your dryer to the outside of your home. Every drying cycle pushes tiny particles past the lint screen, and those particles gradually collect along the walls of the vent.
In the beginning, this buildup may seem harmless. However, as it thickens, it begins to restrict airflow. This forces your dryer to work harder and allows heat to accumulate inside the system—two conditions that can quickly turn into safety risks.
Why Clothes Dryer Vent Cleaning Is So Important
Many homeowners don’t think about their dryer vent until something goes wrong. The truth is that regular clothes dryer vent cleaning prevents multiple problems before they start.
A clogged vent increases fire risk because lint is highly flammable and traps heat inside the duct. It also affects efficiency. When airflow is restricted, your dryer runs longer to achieve the same result, which leads to higher energy bills.
Beyond safety and cost, there’s also performance. Clean vents allow your dryer to operate as intended, meaning clothes dry faster and more evenly. Over time, this also helps extend the lifespan of your appliance by reducing strain on its internal components.
Common Warning Signs Your Dryer Vent Needs Cleaning
In most cases, your dryer will give clear signs before a serious issue develops. Paying attention to these early indicators can help you avoid costly repairs or dangerous situations.
Some of the most common warning signs include:
- Clothes remaining damp after a full drying cycle
- Noticeably longer drying times
- Excess heat in the laundry room
- A burning smell while the dryer is running
- Increased humidity indoors during use
- Visible lint buildup around the exterior vent
- The dryer shuts off unexpectedly
If you notice more than one of these issues, it’s a strong indication that your clothes dryer vent cleaning is overdue.
How Often Should You Clean Your Dryer Vent?
The frequency of clothes dryer duct cleaning depends largely on how often you use your dryer and the type of vent system in your home. While many general recommendations suggest cleaning once a year, that timeline doesn’t apply to every situation.
Households with heavy laundry usage, pets, or longer vent systems often require more frequent maintenance. In these cases, cleaning every six months is usually more appropriate. On the other hand, smaller households with minimal usage may be able to wait up to 12–18 months.
A good rule to follow is simple: if drying performance starts to decline, don’t wait for a scheduled cleaning—address it immediately.
Also Read: How Often Should I Invest in Air Duct Cleaning Services?
DIY vs Professional Clothes Dryer Vent Cleaning
Some homeowners choose to handle clothes dryer vent cleaning themselves, and in certain situations, that can work. If your vent is short, straight, and easy to access from both ends, a basic cleaning kit may be enough to remove light buildup.
However, many homes have longer or more complex vent systems that run through walls, attics, or ceilings. These systems often include multiple bends where lint collects and hardens over time. In these cases, DIY methods typically don’t reach the areas where the most dangerous buildup occurs.
Professional cleaning services use specialized tools designed to clean the entire length of the vent system safely and thoroughly. If your system is difficult to access or hasn’t been cleaned in over a year, professional service is usually the better option.
Cost of Clothes Dryer Vent Cleaning
The cost of clothes dryer vent cleaning can vary depending on the complexity of your system. Most standard residential cleanings fall within a reasonable range, making it an affordable preventive service.
Typical pricing includes:
- Standard cleaning: $85 – $175
- Longer or complex systems: $150 – $250
Factors such as vent length, accessibility, and level of buildup can influence the final cost. Despite this, the service often pays for itself over time through improved efficiency and reduced energy use.
How the Clothes Dryer Vent Cleaning Process Works
Understanding the cleaning process can help you know what to expect when hiring a professional. A thorough service involves more than just removing lint from one section of the vent.
The process usually includes:
- Inspecting the full vent system
- Disconnecting the dryer for access
- Using specialized tools to break up lint buildup
- Removing debris with high-powered vacuum equipment
- Cleaning the exterior vent opening
- Testing airflow to ensure proper performance
This complete approach ensures that the entire system is functioning safely and efficiently, not just the easily accessible parts.
Final Thoughts
Clothes dryer vent cleaning is a simple but essential step in maintaining a safe and efficient home. Ignoring it can lead to higher energy bills, reduced appliance performance, and increased fire risk. On the other hand, keeping your vent clean helps your dryer run better, last longer, and operate safely.
Whether you choose to handle it yourself or hire a professional, staying consistent with maintenance is the key to avoiding problems down the line.
Need Professional Clothes Dryer Vent Cleaning?
If your dryer is showing signs of poor performance or your vent system hasn’t been cleaned in a while, it may be time for a professional inspection.
For homeowners in San Antonio, scheduling a local clothes dryer vent cleaning service can ensure your system is properly cleaned, inspected, and operating at its best.